Headless SDK puts Antla’s Try On UI on a custom Shopify storefront. You load a script once, place <antla-block> on the product page, and the block handles upload, generation, and cart. Use this when you want Antla’s interface. Use Headless API when you build the interface yourself.
This is not the Online Store theme embed. If you sell on a standard Shopify theme, enable the app embed instead. See Enable the Try On button (theme embed).
Antla is installed on the store.
At least one product is in a Funnel and has a product image.
The store has credits.
You can create Shopify Storefront API tokens for the storefront that will host the block.
That storefront can see the product you will test, including tags, images, and variants.
The public token must be able to read shop settings, product IDs and tags, images, variants, and availability. A token that can only read the shop name is not enough.
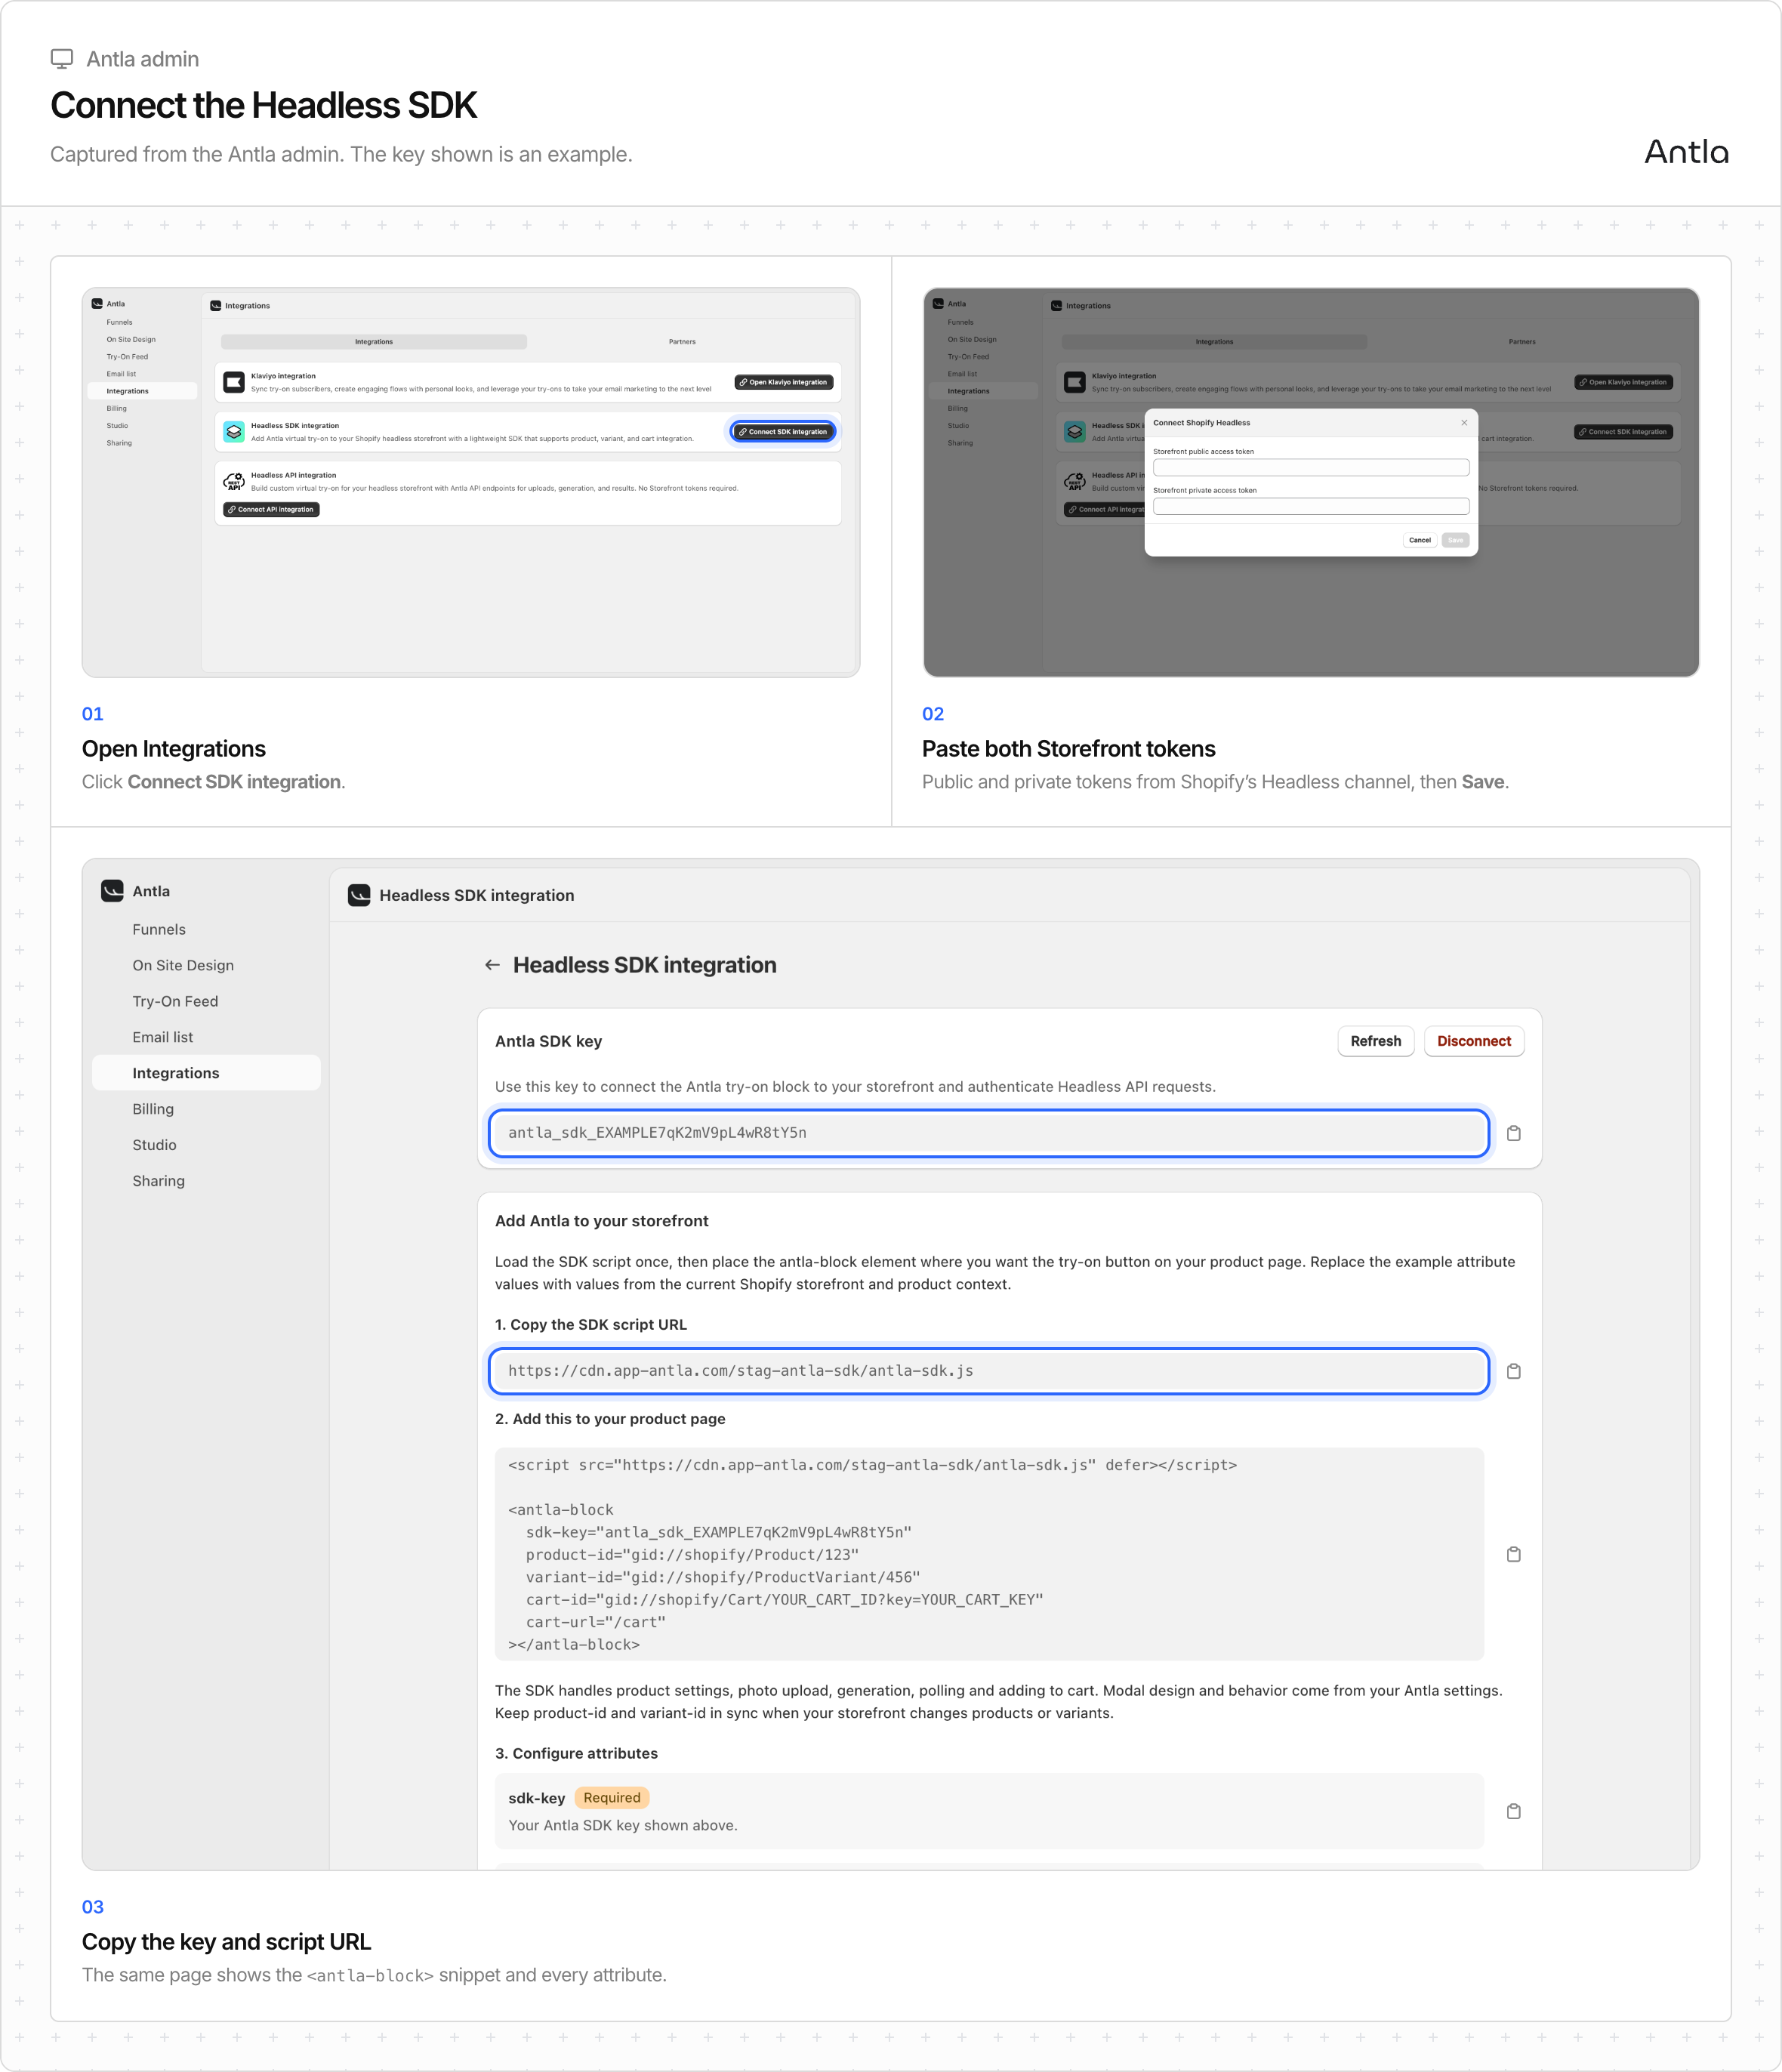
Open Antla → Integrations.
On Headless SDK integration, click Connect SDK integration.
In Connect Shopify Headless, paste Storefront public access token and Storefront private access token.
Click Save.
Antla opens Headless SDK integration. Copy Antla SDK key and Copy SDK script URL.
The private token stays in Antla. Never put it in HTML, a mobile app, or a public repo. The SDK key is a different credential and is meant for the storefront.
If both tokens are missing, Antla shows Both Storefront tokens are required. A failed save shows Could not connect.
Load the script once in the app shell. Place the element on the product page. Replace the example IDs with the product the shopper is viewing.
<script src="YOUR_SDK_SCRIPT_URL" defer></script>
<antla-block
  sdk-key="YOUR_ANTLA_SDK_KEY"
  product-id="gid://shopify/Product/123"
  variant-id="gid://shopify/ProductVariant/456"
  cart-url="/cart"
></antla-block>
Keep product-id and variant-id in sync when the shopper changes product or variant. If your storefront already has a cart, set cart-id to that shopper’s full Storefront cart ID, including any ?key= suffix.
The block creates a cart if you omit cart-id. A cart created inside the block is not automatically the cart your Hydrogen or custom session uses. If Try On works and /cart is empty, the block and the storefront are using different carts.
The block loads product data and your Antla design settings, accepts a photo, starts a generation, polls the result, and adds the selected variant to a Shopify cart. Sold-out variants stay selectable for trying on. Add to cart stays disabled until the variant is available.
Modal design comes from On Site Design. Theme antla_* events from the Online Store embed do not fire from this block.
Refresh replaces the key immediately for the SDK and the API. Update every storefront and app that uses it.
Disconnect Headless SDK removes the saved Storefront tokens. You then choose:
Keep API integration active. The current key still works for API requests.
Disconnect SDK and API. The current key stops for both.
You cannot disconnect the API from the API page while the SDK is still connected. Disconnect the SDK first.