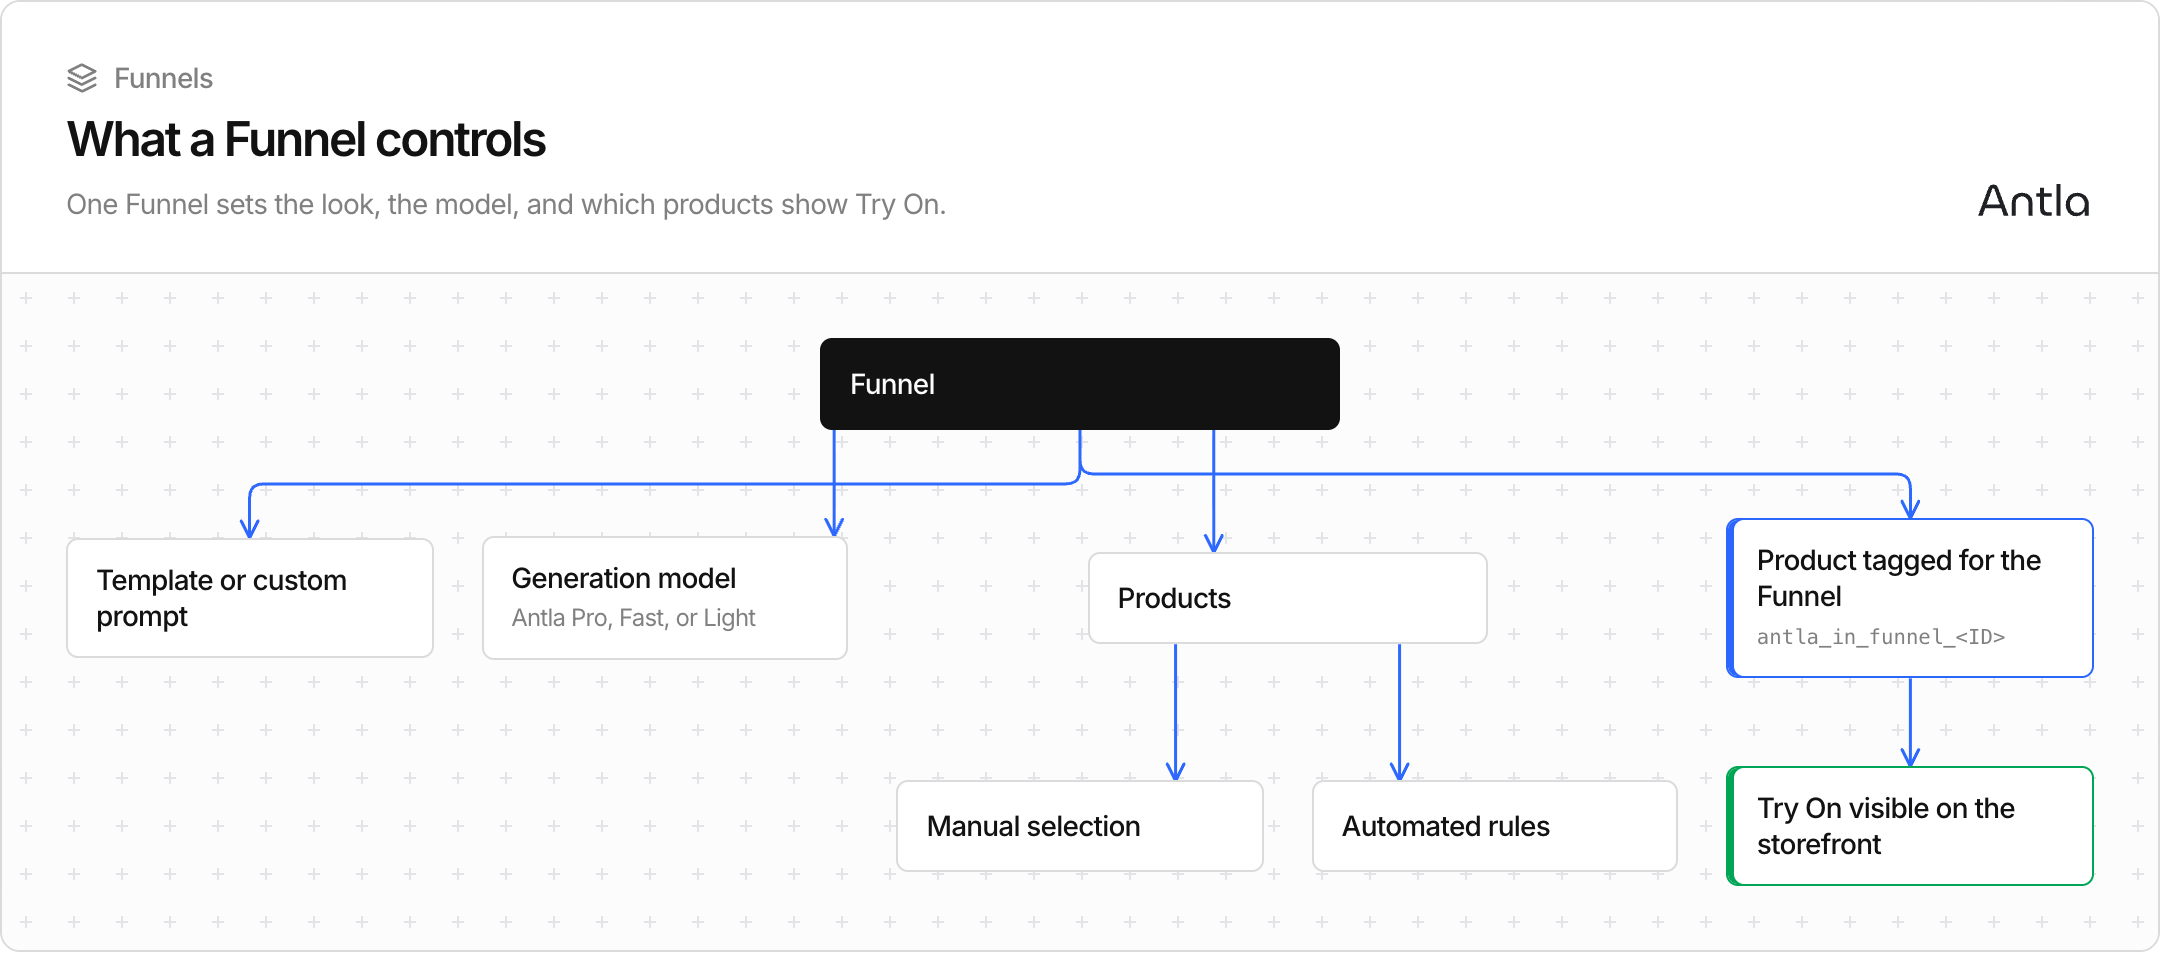
A Funnel is the configuration behind Try On: look template or prompt, generation model, and which products are eligible. Create one Funnel, add products, enable the theme embed, and shoppers can start trying on.
Every Funnel brings together:
Look setup — a template or prompt that steers how garments appear on the shopper
Generation model — Antla Pro, Antla Fast, or Antla Light (when available)
Products — the catalog items shoppers can try on through this Funnel
Products linked to a Funnel are tagged for storefront visibility (for example antla_in_funnel_{id}). That tag, plus available credits and an enabled theme embed, is what makes the Try On button appear.
In Shopify admin, open Apps → Antla.
Go to Funnels (or follow the onboarding prompt to create your first Funnel).
Click Create (or the equivalent new Funnel action).
Select a template that matches your category, or customize the prompt if your workflow allows it.
Pick a generation model:
Antla Pro — highest accuracy (~100%), ~25 seconds
Antla Fast — strong accuracy (~88%), ~13 seconds
Antla Light — ~85% accuracy, ~12 seconds; best for swimwear, underwear, and smallclothes; available when cloth type is dress
Name the Funnel clearly (for example “Summer dresses – Pro”) so your team can find it later.
Model details: Choose a generation model (Pro / Fast / Light).
Add products in one of two ways:
Manual — pick specific products for a controlled launch set
Rules — automatically include products that match tags, collections, or other criteria you define
You can start manual for a pilot, then switch or expand with rules as you scale. Full comparison: Add products: manual vs automated rules.
Save the Funnel when products are linked.
A Funnel alone is not enough for shoppers to see Try On:
Enable the Antla theme app embed — Enable the Try On button (theme embed).
Confirm credits are available.
Open a Funnel product on the live (or preview) storefront and verify the button.
Open a product from your Funnel.
Tap Try On.
Upload a clear photo (good lighting, subject facing camera).
Wait for the result, then review quality for that garment type.
If results look soft or misaligned, try another model or refine the Funnel’s look setup. For shopper photo guidance, see Photo tips for best results.
One category per Funnel when looks differ a lot (for example dresses vs outerwear).
Start narrow — a dozen SKUs is enough to validate quality and conversion.
Match model to priority — Pro for hero launches; Fast for high-volume browsing; Light for eligible dress / smallclothes use cases.
Name Funnels by season or collection so analytics and the Try-On Feed stay readable.
You can update products, model, and look settings after launch. When you add or remove products, Antla updates Funnel tagging so storefront eligibility stays in sync. After big changes, spot-check a few product pages.